
I'm not going to lie, this was a MUCH bigger project than I had anticipated. I started it yesterday, umm, and tomorrow is Day 1. Oh dear. Yes, I should have started like a week ago. At least. Live and learn though, right? :)
Despite the fact that my perfectly cleaned and decorated home is now trashed by my 3 tornadoes, the outcome was completely worth it!
Keep in mind as you read along, that I do not in any way consider myself a sewing person. When I was 12 I sewed my finger. Really. The needle broke in half inside my finger, the ends pointing out both sides. Since that traumatizing day I can count how many times I've touched a sewing machine on one hand.
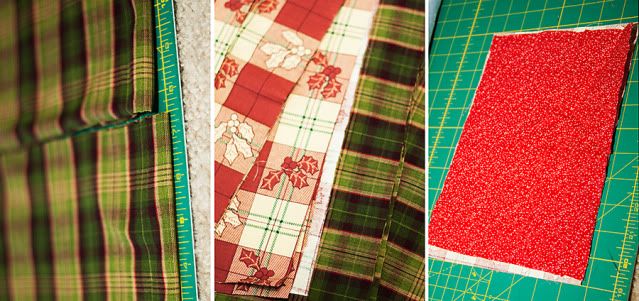
It all started with these 2 slabs of fabric I have been hanging onto now for 2 years. I love Christmas. It is my favorite holiday and the only one I decorate for. I love angels and snowmen. And every year I find more, antiqued-oldish looking ones to add to my collection. But I wanted more. Something the kids can actually touch :)
So my new tradition- a new advent calendar to add to the collection list every year.
So I scoured the internet for ideas. I found one's I loved, one's I hated.. and in the end I came up with my own idea. I wanted crafty, homey, imperfect, and a touch of whimsy.
So I started by cutting the fabric into 7.5x10 inches.
Also cutting lining into 7.5x 9ish :) I wanted it to be layered looking at the opening.
Lillie was so enthralled with my work ethic she fell asleep. On the cutting board. While I was cutting.

Then I sewed the lining to the fabric. I made the place for my twine o go through first, then sewed down the sides.

Turned the bags right side out and put the twine through..

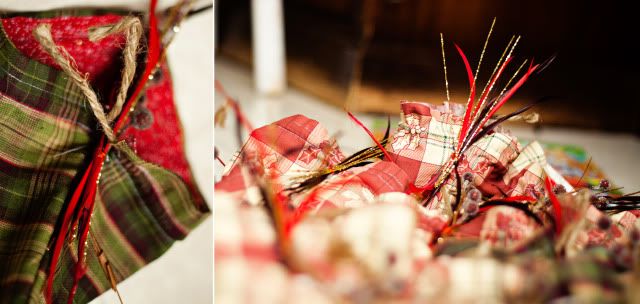
Next the fun part, I took all my picks for decorations and created several different little "twigs" to adorn the bags.

I love love LOVE my antiquey snowmen


And of course everything needs a touch of feather and gliter

I made several variations of the twiggs.

Glued the twiggys to the center of the front of the bags with hotglue. Making sure to avoid gluing where the twine comes through.
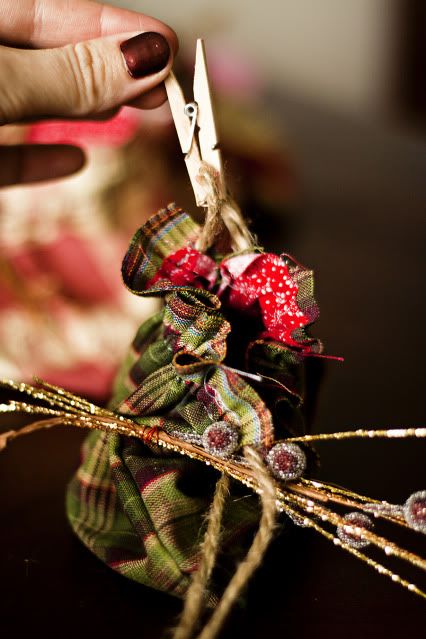
Then I pulled the the twine up at the back of the pouches, and put a medium sized Clothespin on it. For hanging :)
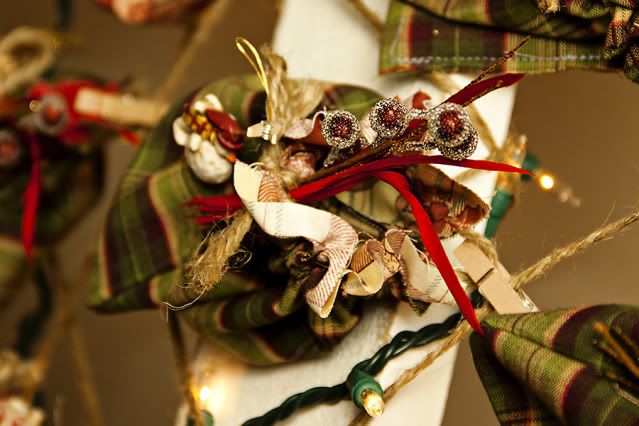
Tied a bow on the front. and hung a tiny clothespin and ornament.
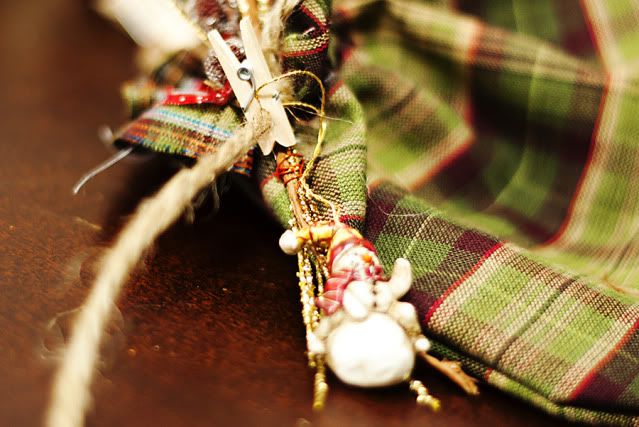
The final pouch. I left the edges raw on purpose, I want them to fray overtime.
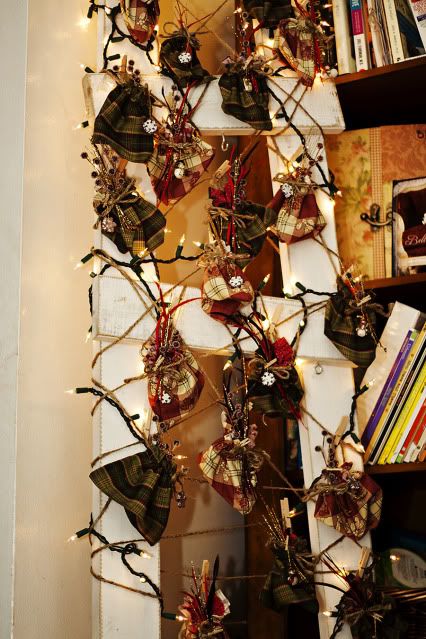
And my pouches were complete. Now they adorn my white later laced chaotically with lights and twine.

And tomorrow when I actually finish these- I will add rolled up papers with the numbers and activities on each day.

MERRY CHRISTMAS!!!!!
Despite the fact that my perfectly cleaned and decorated home is now trashed by my 3 tornadoes, the outcome was completely worth it!
Keep in mind as you read along, that I do not in any way consider myself a sewing person. When I was 12 I sewed my finger. Really. The needle broke in half inside my finger, the ends pointing out both sides. Since that traumatizing day I can count how many times I've touched a sewing machine on one hand.
It all started with these 2 slabs of fabric I have been hanging onto now for 2 years. I love Christmas. It is my favorite holiday and the only one I decorate for. I love angels and snowmen. And every year I find more, antiqued-oldish looking ones to add to my collection. But I wanted more. Something the kids can actually touch :)
So my new tradition- a new advent calendar to add to the collection list every year.
So I scoured the internet for ideas. I found one's I loved, one's I hated.. and in the end I came up with my own idea. I wanted crafty, homey, imperfect, and a touch of whimsy.
So I started by cutting the fabric into 7.5x10 inches.
Also cutting lining into 7.5x 9ish :) I wanted it to be layered looking at the opening.

Lillie was so enthralled with my work ethic she fell asleep. On the cutting board. While I was cutting.

Then I sewed the lining to the fabric. I made the place for my twine o go through first, then sewed down the sides.

Turned the bags right side out and put the twine through..

Next the fun part, I took all my picks for decorations and created several different little "twigs" to adorn the bags.

I love love LOVE my antiquey snowmen


And of course everything needs a touch of feather and gliter

I made several variations of the twiggs.

Glued the twiggys to the center of the front of the bags with hotglue. Making sure to avoid gluing where the twine comes through.

Then I pulled the the twine up at the back of the pouches, and put a medium sized Clothespin on it. For hanging :)

Tied a bow on the front. and hung a tiny clothespin and ornament.

The final pouch. I left the edges raw on purpose, I want them to fray overtime.

And my pouches were complete. Now they adorn my white later laced chaotically with lights and twine.

And tomorrow when I actually finish these- I will add rolled up papers with the numbers and activities on each day.

MERRY CHRISTMAS!!!!!

3 comments:
Very pretty, Hollie. It turned out great. I think I will keep Lillie to adorn my cutting board. Mom
CUTE! I love the way it turned out! The little snowmen are SO cute!
Adorable...seriously I wish I had just an ounce of your creativity!
Post a Comment